I’m nowhere near a perfect colourist & I DO make many mistakes but I enjoy what I do & if doing this step by step helps one person then to me that makes it worthwhile. Gotta say Iv loved making it & hope whoever reads it enjoys it also. So here goes my 1st colouring tutorial 🙂 xxx

What I used….
Neenah card stock for stamping & the die cutting
Spectrum Noir pens… colours are….. IG1,2,3,5 CR 2,3 CG1, TB1 EB1, 2 GB8,11 LG3 & 4 , DG1, HB1,2
Collall 3d Gel & Tacky Glue
Marianne dies (Unsure of names as no names on packets.
Blue Velvet Ribbon
docrafts Pearl/Diamanté
Scalloped circle card base
Pale Blue Pan Pastel
I am going to start of with Mrs Bebunni ears…. For this ear I used IG1,2,3,5…..
Don’t be in a rush to put your finished colour down just for 1 ear I did 7 steps. I have added the colours I used to the side of the pictures as some of my identification markings have rubbed off.
 IG1 I covered the full ear
 IG5 Here I added the darkest colour
 IG3 Using this pen go over your darkest colour & bring the colour out towards the edge of the ear more
 IG2 again going over all the colours & bringing it towards the edge
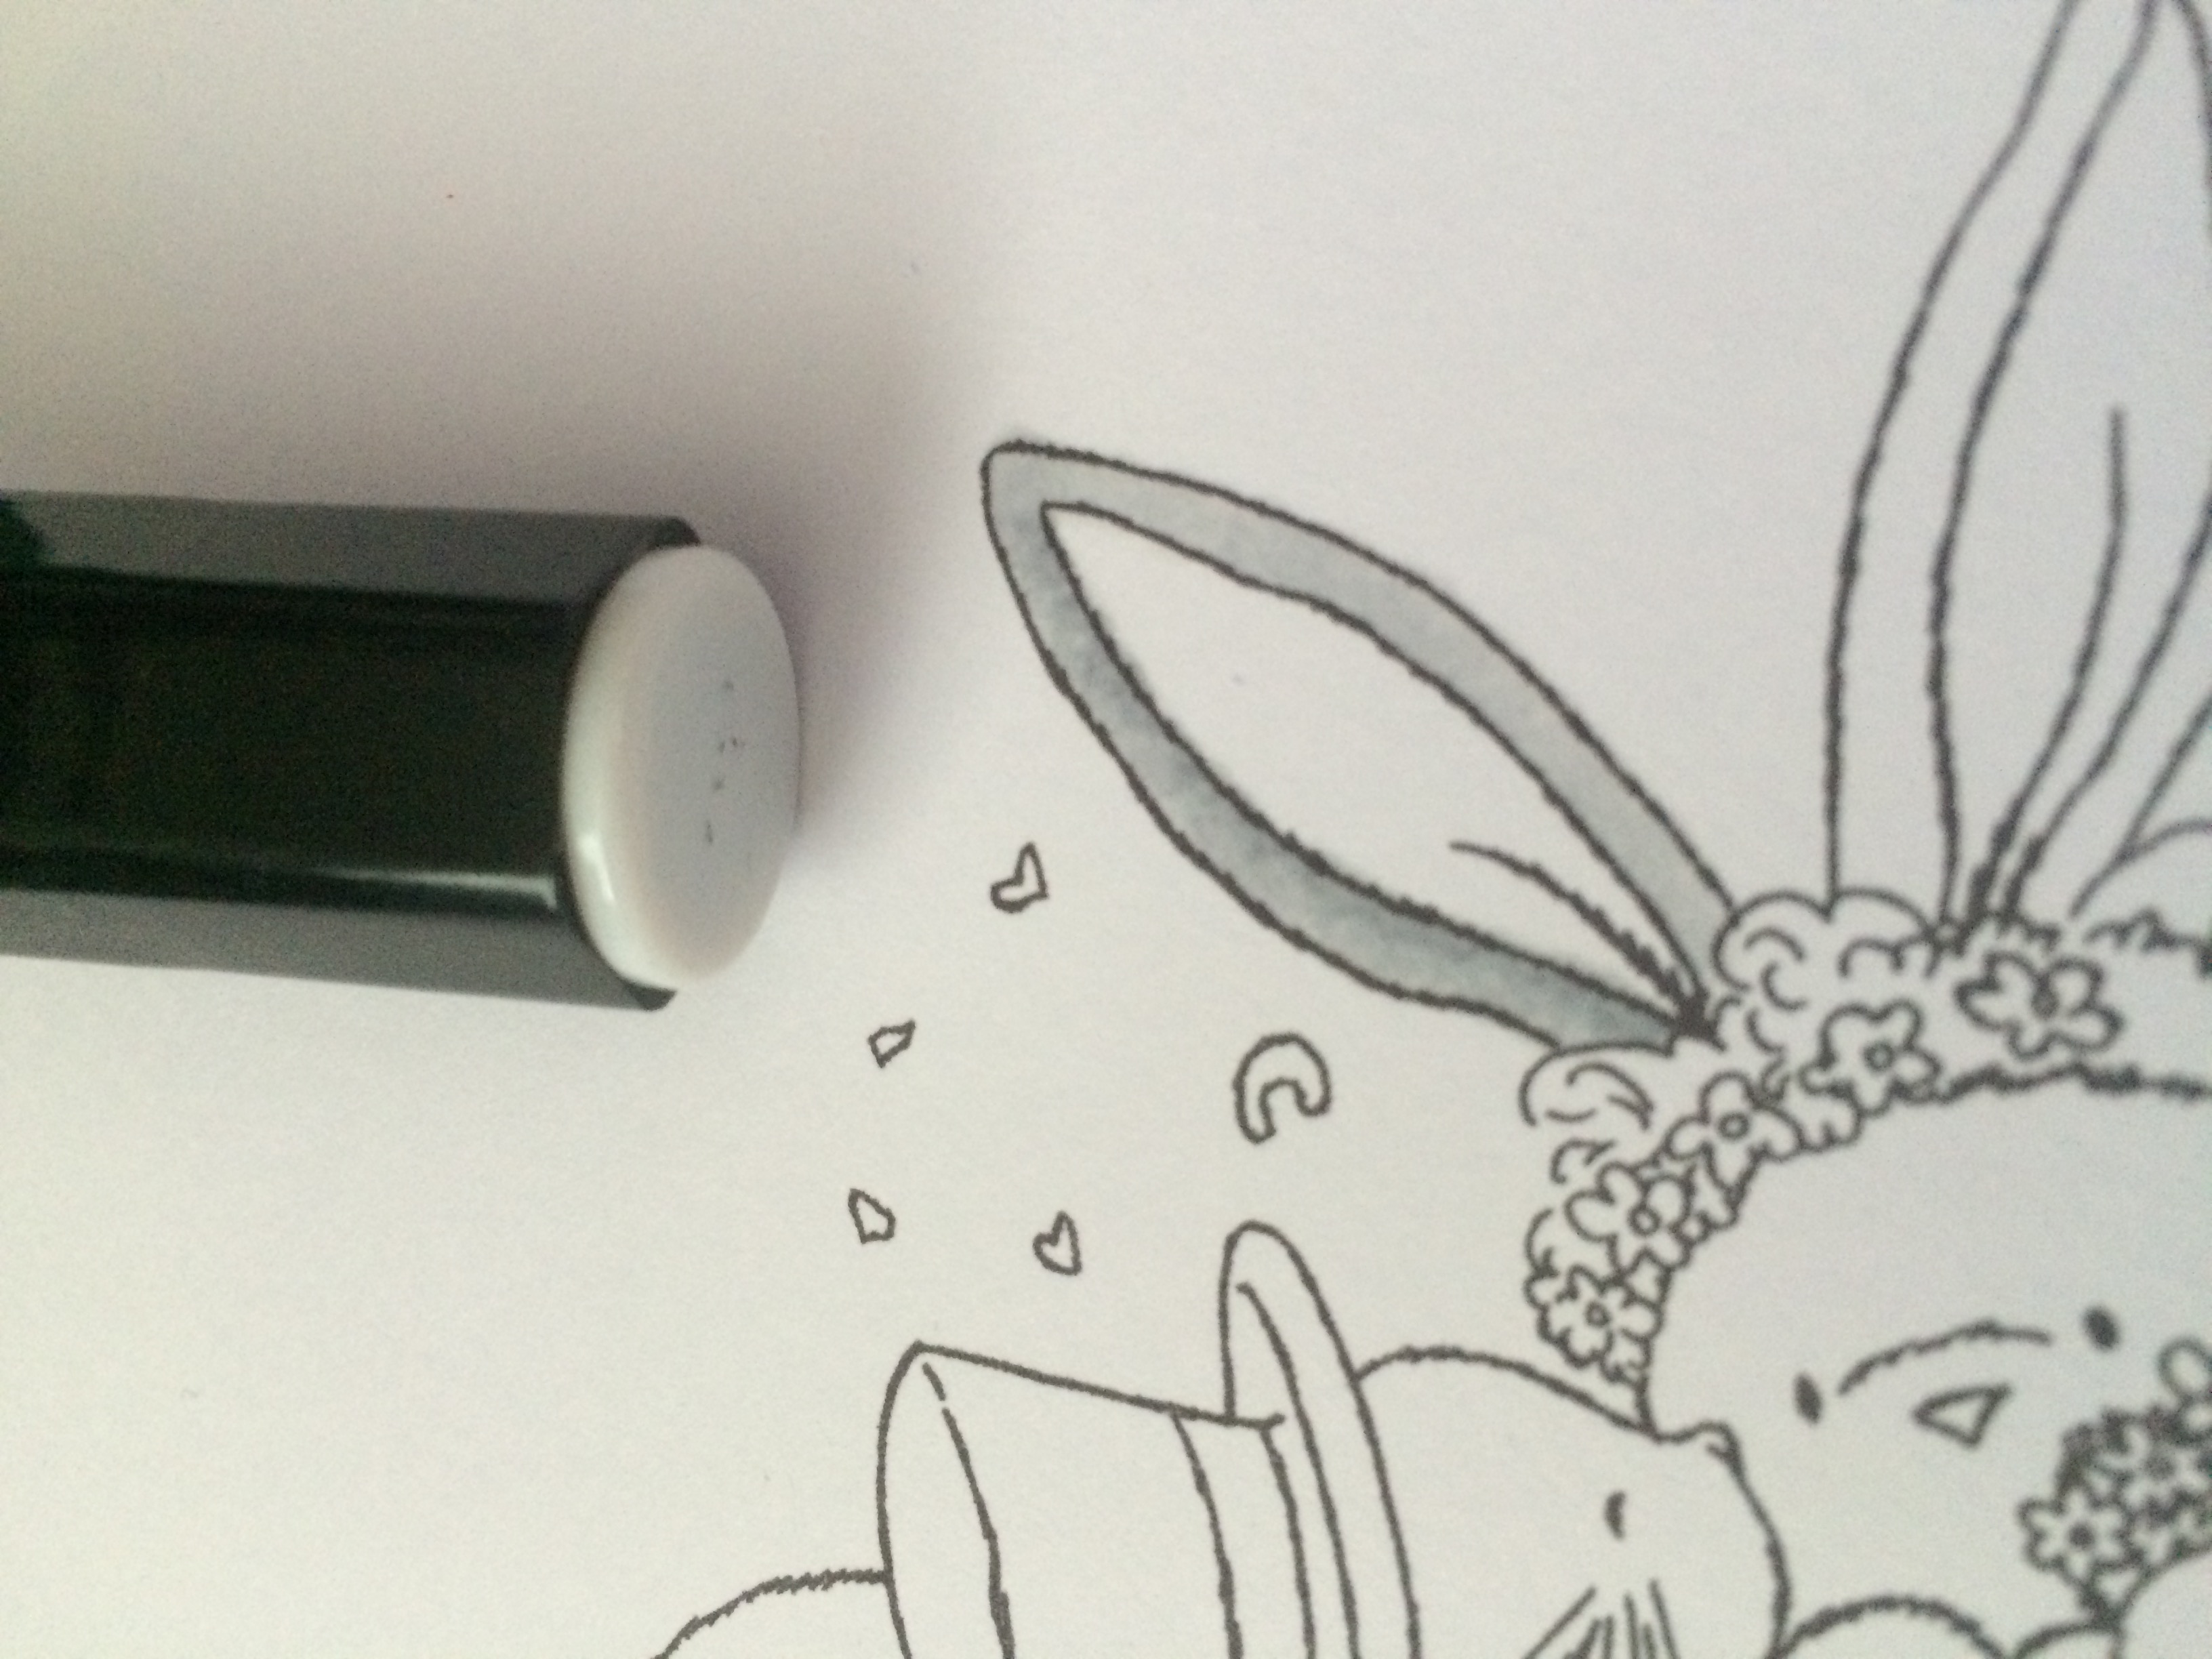 IG1 I used this to blend all my colours together
 IG5 I now added more of the darker colour to make it stand out
 IG1 Then I added lightest again so no harsh lines.
Other ear I did in 6 stages still using the same pens IG1,2,3,5…..
 IG1
IG1
 IG5
IG5
 IG3
IG3
 IG2
IG2
 IG5
IG5
 IG1
IG1
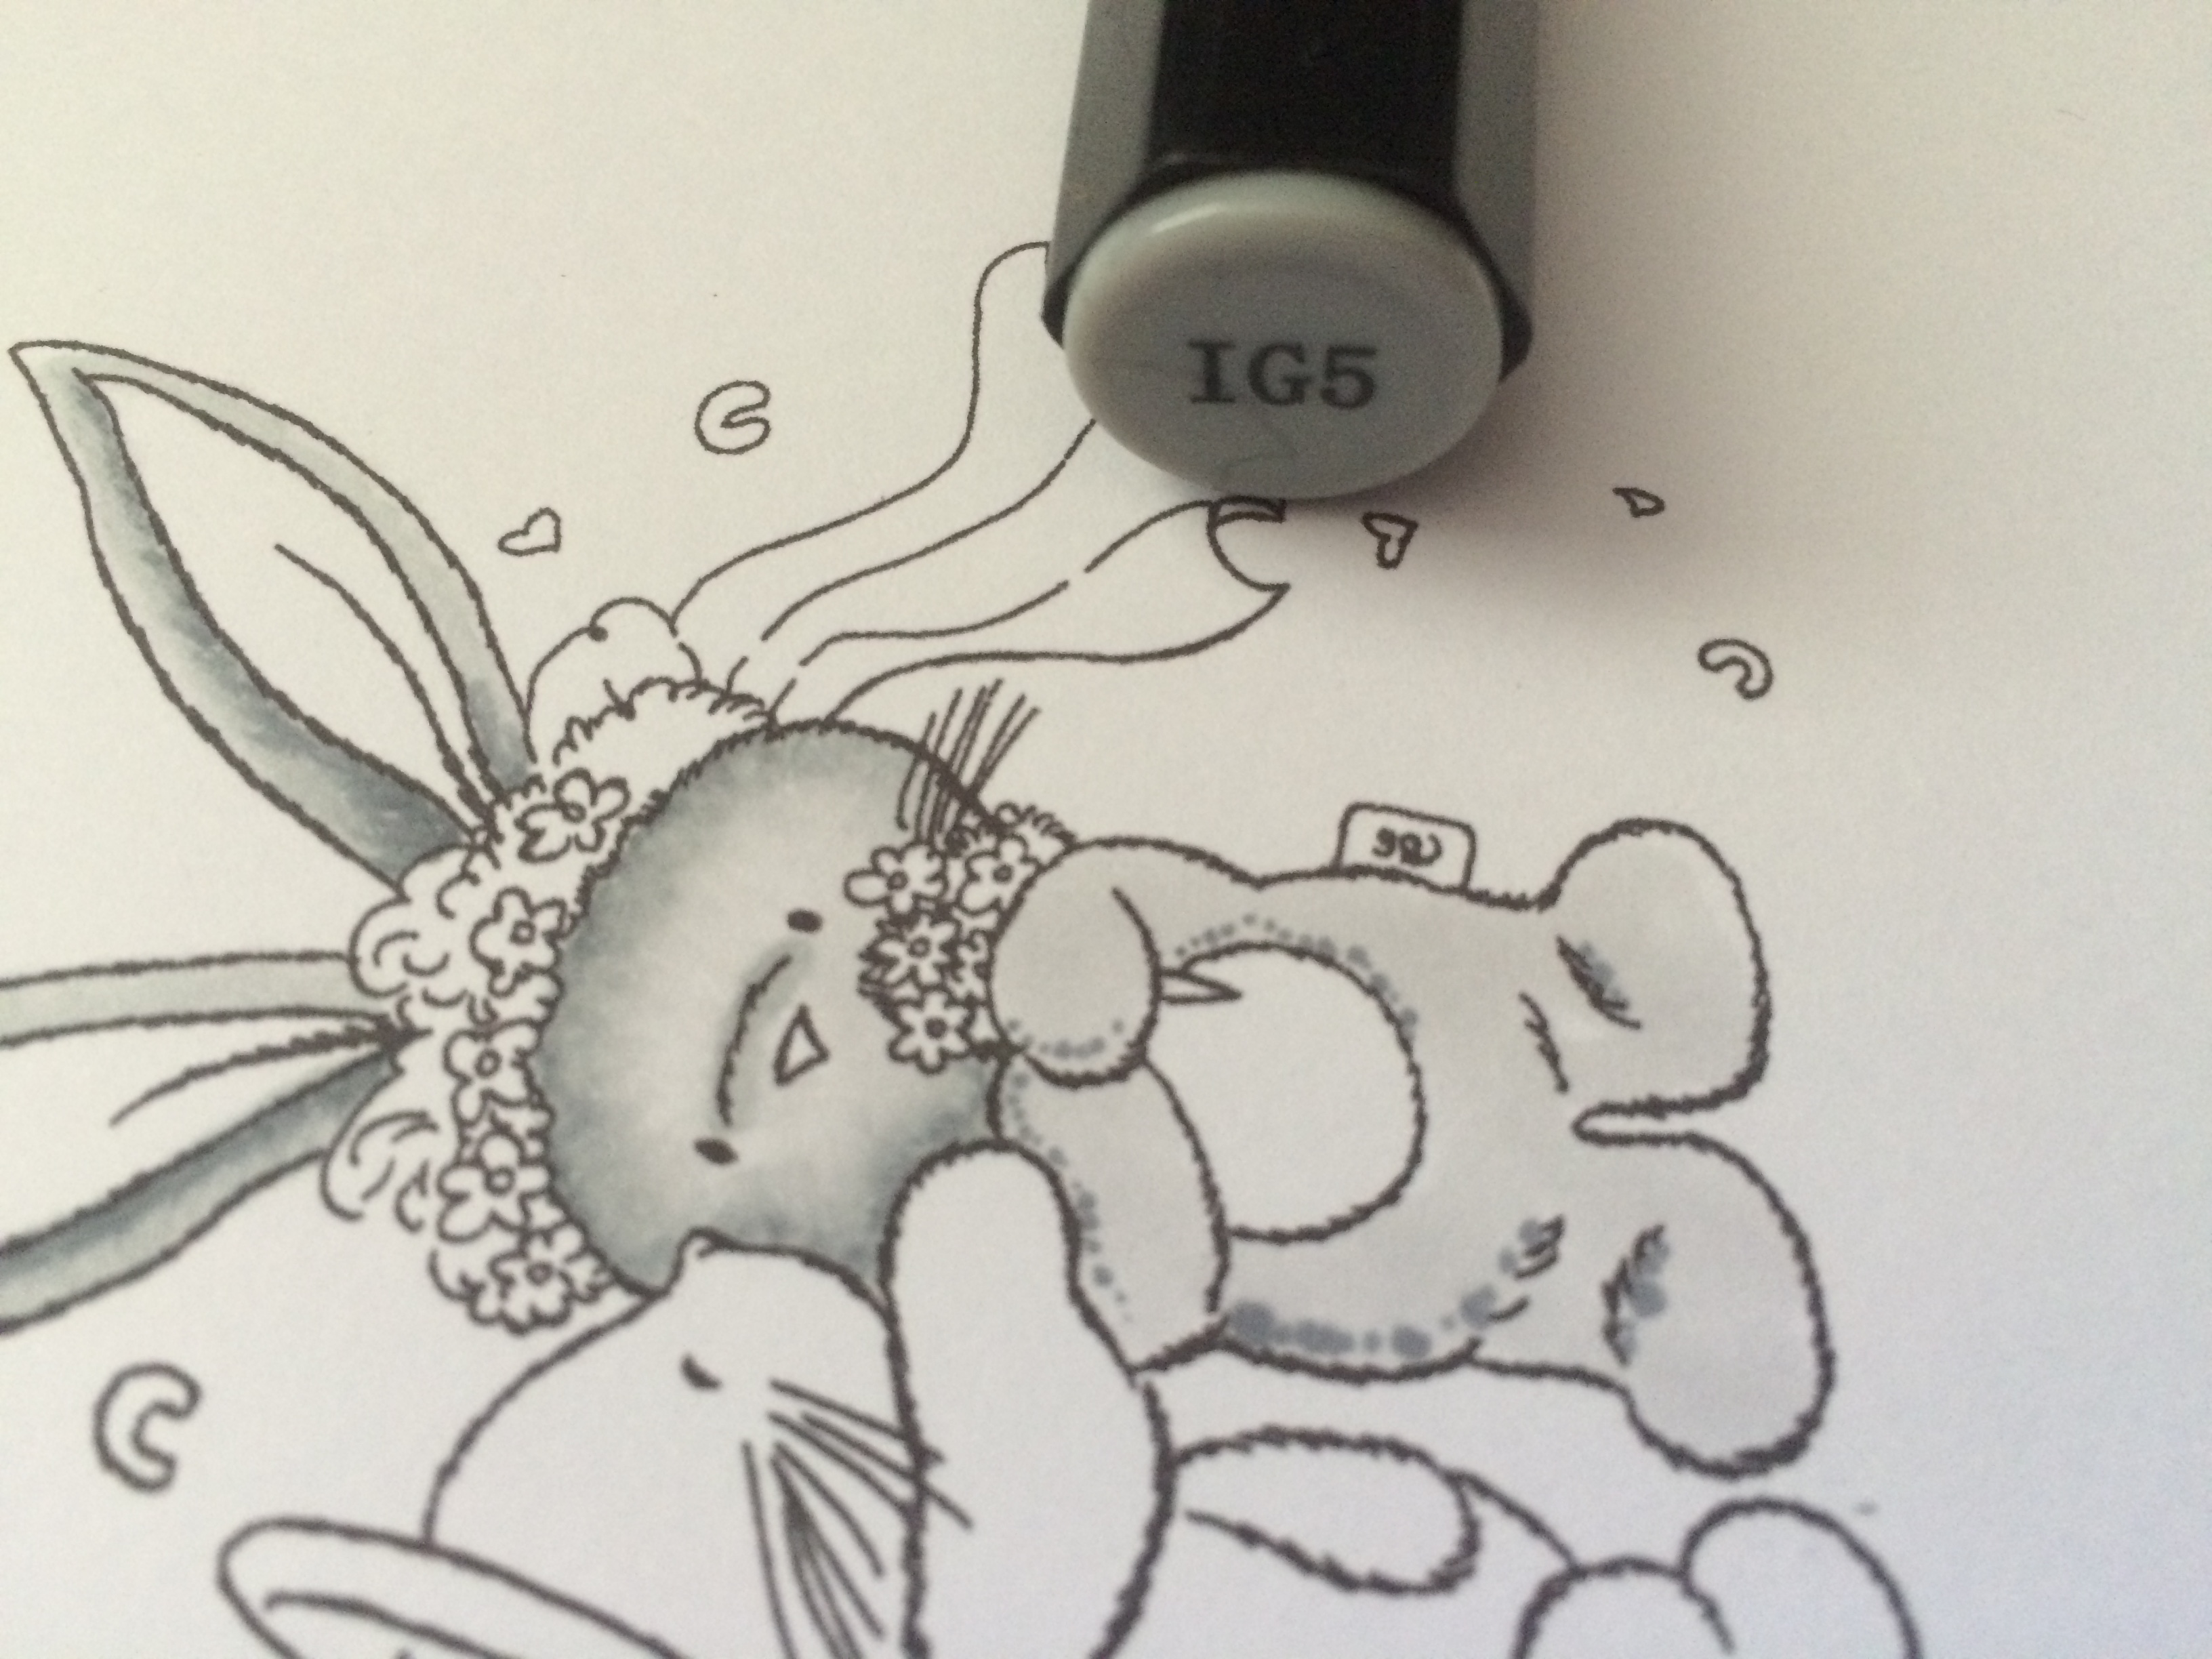
Next I started to colour her head in 5 steps still using the same pens IG1,2,3,5…..
Keep turning your image around when you are colouring
 IG1 to do the full colour
 IG5 to add little dots where I wanted the shading. For this bit I turned the image upside down
 IG2 to blend the dots
 IG3 to bring the colour further into the face
 Ig1 to cut out the harsh lines. If you wanted a darker shadow you would now add IG5 again but I was happy with this amount of shading
Next was colouring Mrs Bebunni’s body still using the same pens IG1,2,3,5
 IG1 to do the full cover
 IG5 to do the shading dots
 IG3 to blend the dots
 IG2 moving it out to the centre of your Bebunni
 IG1 to blend it all together
Next to start on Mr Bebunni here I am going to start on his body still using the same pens IG1,2,3,5
 IG1 to do your full colour
 IG5 to put the shading dots down
 IG3 to blend the dots & add a little more shading to areas I didn’t want to dark
 IG2 to start blending the colours together
 Final all over coat of IG1
Now for his face still using the same pens IG1,2,3,5…..
 IG1 for full colour
 IG 5 for my shading dots
 IG3 for blending the dots
 IG2 with this i started to pull the ink further into his face
 IG1 to blend everything together
Now for his ears I am going to do these two both together still using the same pens IG1,2,3,5 for me this was done in 6 steps as I needed to use my blender pen to remove excess ink from inside ear. Yep I make mistakes! Tons of them but you only learn by doing a mistake 😉
 IG1 To add the 1st coat of block colouring
 IG5 to add my shade dots
 IG3 to blend my dots
 IG2 to start the blend moving over the ear
 IG1 to blend everything

 Look here is where I used to much ink so I dotted the blender pen over the top & removed it.
Ears & Stomache for Mrs Bebunni I used colours… CR2 & CR3
 CR2 to do your block colour
 CR3 to add a little shade
 CR2 to go back over it all to blend it
Mr Bebunni ears here I used CG1 & TB1
 CG1 to do the block covering
 Tb1 to add some colouring I also added a little to the left hand side of his tail 🙂
Mr Bebunni Hat I used EB2 GB8 & 11
 EB2 I used this to flick the colour from the outside of the hat to the middle so I left a white highlight showing
 GB8 this looks so harsh but It will work 🙂 just add this colour for your shadow
 EB2 where you have just added your shadow use this colour now to blend the 2 colours again flicking it into the centre
 GB11 I used this one for the sash on his hat. I added 1 coat & then went back & used it again
Now its Mrs Bebunnie’s Veil I used EB1 & 2
 EB1 I only used a little of this on some outlines
 EB2 I added a little to the top of the veil & a little to the bottom
 EB1 to blend the colours in
Next I did the flowers on her head & her bouquet at the same time using colours LG3 & 4
 LG4 is lighter than LG3 so I used this 1st just dotting around the stamp
 LG3 Then I used this colour to add more dots over the top. This is where I noticed I had missed part of the Veil head dress so I went back to colour it
Using EB1 & 2
 EB1 to colour block it
 EB2 added to left hand side
 EB1 to blend
I left the colouring here so I could see what colours I would use after Iv decided what kind of card I was going to make…..


I decided on using a Marianne Die to cut my image out, but as you can see here the ears would of been chopped off if I had but the image & die straight into the machine so in picture 2 you can see I marked on each side of the ear where I needed to put so I could bend them forward to stop this happening. I then put the die back in place & put through my Die cutting machine.
 I then used Pan pastel to chalk around the edge of the die & a little in the centre near the stamped image to take away some of the white glare.
 Then I cut out another die cut shape using a different Marianne die
 I glued the main image to the centre of the 2nd Marianne die cut
And then used Tacky glue to add the frame.
 I cut out the 2 x Marianne dies again on white card & again chalked the 1st Die cut frame like I did for the main toppper
 It was now that I finally decided to colour the rest of the image in. I used TB1, DG1, HB1, CR2 & HB2 to colour the flowers & on Mrs Bebunnie’s body I noticed I had not coloured the tag so I coloured it using CR2
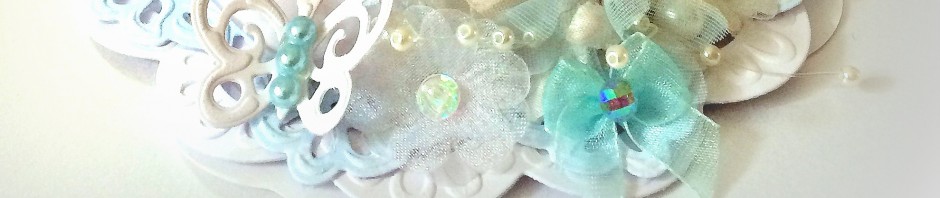
To make the card up I used a circle scalloped card & folded one side down to make an easel card, I added the main stamped topper & then the bottom Die topper using Tacky glue. Then I used 3d gel to add a velvet bow & the pearl Gem was cream so I coloured it using TB2 and again used 3d gel to stick it on top of the bow.
I haven’d added a sentiment yet as I will put it in my card box & wait until its needed for a wedding & then I will personalise it.
Many Thanks for reading.
Happy Crafting Sarahjayne xx

WOW !! Fab Tutorial xxx Thank you Sarah XXXX
LikeLike
Bless Thank you Lisa 🙂 Thank you to you for giving me the push to finally post it 🙂 xxx
LikeLike
Absolutely brilliant tutorial. It is really easy to follow and easier to follow than a video for me. Well done.x
LikeLike
Thank you Kay, I was so nervous posting it, Its been in my drafts for a couple of days now, But glad I posted it now 🙂 xxx
LikeLike
A stunning card and beautiful image, fabulous tutorial thank you for sharing. Love those die cuts to.
Hugs Erin xx
LikeLike
Thank you Erin, I do love the Marianne Die’s 🙂 xxx
LikeLike
Gorgeous creations! xx
LikeLike
Thank you Erin 🙂 xxx
LikeLike
Thank you for this Sarah! I don’t have this image but I’ll try and find one similar and give it a go xx
LikeLike
Thank you Anne, I hope you do 🙂 xxx
LikeLike
Great tutorial. Thank you for sharing.
Hugs
Linda xxx
LikeLike
A brilliant step-by-step and a lovely finished card x
LikeLike
Thank you Andree 🙂 xxx
LikeLike
Such a FAB tutorial, Sarah and a lovely card! As a Spectrum Noir user myself this was so uber helpful! Thank you, thank you, thank you! 🙂
Have a lovely weekend! xxx
LikeLike
Thank you Jane, I was sooooo nervous posting this, but I’m super happy I did now :)xxx
LikeLike
Great tutorial and fabulous card thank you for sharing crafty hugs Judith x
LikeLike
Thank you Judith 🙂 xxx
LikeLike
Hi your card is gorgeous the image is beautiful. Thank you for the step by step. Hugs Jackie
LikeLike
Fabulous card and brilliant tutorial hun, think these will be my next buy, just finished buying all the Pencils, which I love BTW….hugs xxx
LikeLike
What a charming wedding card! It looks delicate and airy, but very amusing at the same time. And your detailed tutorial is just fabulous! It was very interesting to see how this wonderful card came into being. 🙂
LikeLike
Thank you 🙂 It was my 1st coilouring tutorial & I was real nervous at posting it, but I’v had lots of lovely comments & messages I hope to do many more. I know you have some beauties on your digital stamp site & looking forward to having a play with them 😉 xxx
LikeLiked by 1 person